(
(

r4pg:[Expedition] PoE 3.15 Templar Forbidden Rite Totem Hierophant Endgame Build
This PoE 3.15 Templar Forbidden Rite Totem Hierophant build handle high-tier mapping very easily. It is not tanky, like most totem build, but can easily reach 10k, up to 12k EHP with 16% physical mitigation. The best part of Forbidden Rite is the single target. This spell melt boss down almost instantly.
![r4pg:[Expedition] PoE 3.15 Templar Forbidden Rite Totem Hierophant Endgame Build](https://dhost1.mmomiss.com/uploads/202108/PoE Expedition Templar Forbidden Rite Totem Hierophant Endgame Build.jpg)
Skill Tree
Ascendancy: Pursuit of Faith -> Ritual of Awakening -> Conviction of Power -> Divine Guidance
Pantheon
Major: Soul of the Brine King - Cannot be stunned recently and reduced effect of chill
Minor:
Soul of Abberath - Unaffected by Burning Ground (personal pick)
Soul of Shakari - Reduced chaos damage taken (probably best)
Bandit: Either Help Alira or Kill All
Passive Tree & PoB
Path of Building Link: https://pastebin.com/CHqejs5b

Gems Setup
Primary
Forbidden Rite -> Increased Critical Strikes -> Increased Critical Damage -> Void Manipulation -> Increased Area of Effect/Concentrated Effect -> Hypothermia
Note that if you are not yet using a Soul Mantle, Spidersilk Robe you'll need to equip a Spell Totem Support gem to convert Forbidden Rite into a Totem; the support gems above are listed in order of priority so drop gems as needed to fit your current available links.
If you don't have Zerphi's Heart, Paua Amulet, replace Hypothermia for either Volley, Multiple Totem (if you are not using it for the Wither setup), Faster Casting or Cruelty.
I use Increased Area of Effect in most case and only swap to Concentrated Effect during big bosses (Sirus, Maven, etc.)
Use Anomalous Forbidden Rite for extra clear speed. The gem gain +2 autoproj at 20% quality and gain another at gem level 21. It does not boost single target DPS.
Damage
Wither -> Spell Totem -> Multiple Totems
This is a basic automated Wither setup. Multiple Totems allow you to place two extra spell totem that will Wither the enemy without losing any totem from your main damage setup.
Wither is a 90% increased damage taken at 15 stacks, further increased by the Corruption Node on the tree, for a total of 108%
Curse
Arcanist Brand -> Assassin's Mark AND/OR Despair
Arcanist Brand is probably the easiest way to apply a Mark to an enemy. Assassin's Mark is the best curse for Critical Strike build. If you get an extra curse from somewhere, you can also use Despair, but Mark are generally stronger.
Recommended quality: Anomalous Assassin's Mark
Utility
Steelskin -> Cast when Damage Taken -> Increased Duration -> Void Sphere
Totem build tend to be very weak defensively. Steelskin give a decent amount of EHP when you need it (right after getting hit). Void Sphere spawn on top of the enemy that triggered the setup, it confuse the AI and stack them together. I recommend level 19 Steelskin with level 16 Cast when Damage Taken.
Movement + Utility
Vaal Cold Snap -> Increased Duration -> Flame Dash -> Arcane Surge
Flame Dash is our main Movement Skill to travel fast. At level 20, it can trigger a level 8 Arcane Surge every cast, giving us extra Damage.
You might want to use the Anomalous version of Flame Dash if you have the Movement Cooldown Reduction from Watcher's Eye and Boots for extra range.
Vaal Cold Snap is used to generate Frenzy Charges against bosses. It also chill and slow down enemy close to us. It can be used to trigger Zerphi's Heart Soul Eater, but I prefer to use Vaal Haste to do so (I use both).
Movement
Phase Run -> Increased Duration -> Enhance
This is a decent setup to move safer and faster when Flame Dash is not to use (in enclosed space, Delve, walking throught a pack, etc.)
Enhance can be replaced for something else, but the extra Movement Speed % is nice.
Aura
Only use 50% aura if you are currently using an Essence Worm to not reserve any Mana.
Best Damage Aura: Zealotry
Best Utility Aura: Haste
Other: Clarity OR/AND Precision
You should take into account available Watcher's Eyes for your Aura.
I would only recommend Haste if you have a increased Cooldown Recovery Rate of Movement Skills Watcher's Eyes.
Only use Clarity or Precision at level 1 if you have a Watcher's Eyes that require this Aura.
Check the Item section for more info.
Awakened
Awakened Void Manipulation and Awakened Increased Area of Effect
Note: Awakened gem impact is very minimal in 3.15, it is not a priority to get them. Also, you might want to consider buying them already level 5 or to check the price of Facetor's Lens from harvest to upgrade them quickly.
Gear Setup
Helm
This version use Viridi's Veil, Praetor Crown (if you don't go for Atziri's Reflection, Golden Buckler) to acquire Hexproof.
Hexproof is very similar to "Unaffected by curses". It also allow us to use Self-Flagellation, Viridian Jewel (20% damage per curse) and Coward's Legacy, Chain Belt (Low Life).
This require us to use a Magic Ring in our right slot.
The item also come with +1/+2 to socketed gems and decent elemental resistances.
This is a boss drop from Maven (around 1/5 chance to drop).
Best enchant: Forbidden Rite fires an additional Projectile
Body
The best Body Armour for totem build is Soul Mantle, Spidersilk Robe. It allow us to have a 7-link (come with a level 20 Spell Totem Support),
give us an extra totem and curse ourself every time one of our totem die, allowing us to use Self-Flagellation, Viridian Jewel.
We can boost our damage even further by getting one or two corruption on it.
The best DPS corruption is: +2 to Level of Socketed AoE Gems and +2 to Level of Socketed Projectile Gems.
+1 to Level of Socketed Gems is also very good.
Gloves
I recommend Asenath's Gentle Touch, Silk Gloves. The build struggle with survivability: Fast target are hard to hit, we don't have a way to destroy corpse, etc.
Those gloves solve many of those problems: Most corpses end up destroyed on kill and explode for extra damage/clear. Our totem will apply Temporal Chains on Hit. It will also blind in some situation
The gloves also come with decent Life and Mana and a very cool effect when you kill something.
Best enchant: Trigger Commandment of Spite when Hit
Boots
120% increased Critical Strike Chance if you haven't Crit Recently
--------------------------------------------------------------------------
10% reduced Movement Speed
40% increased Cooldown Recovery Rate of Movement Skills
+65 to maximum Life
+6% to Fire Resistance
+17% to Cold Resistance
+28% to Lightning Resistance
30% increased Movement Speed
Cannot be Frozen
The build lack in resistances badly, as it use many unique items. Here we have to fill the gap by using Rare Boots with specific stats.
Personal choice of Boots type: Dreamquest Slippers (increased Cooldown Recovery Rate of Movement Skills)
Here is the list of mods we are looking for:
Prefix - Movement Speed %
Prefix - Life
Prefix - Open Prefix to craft Cannot be Frozen (1 Exalt). It is a veiled craft from Rin (syndicate).
Suffix (3x) - Enough resistances to be at 75%. Chaos Resistance if you can afford it.
Best enchant: 120% increased Critical Strike Chance if you haven't Crit Recently (the only thing that can crit on our build is Void Sphere in our Cast when Damage Taken setup)
Weapons
Here we could use Sceptre, but Wand can come with Projectile Speed, hence why I recommend to use wand.
We want to use two Rare Wand.
Both the wand should have at least 5 good mods. One should at least have a good tier of Projectile Speed (for safety) and one should have +1 to Level (so we can easily reach level 21 Forbidden Rite on Anomalous Quality without corruption).
Here is the list of mods we are looking for:
Prefix - % Increased Spell Damage
Prefix - Mana
Prefix - +1 to Level of all Spell/Chaos Skill Gems
Suffix - % increased Cast Speed
Suffix - % increased Projectile Speed OR increased Critical Strike Chance for Spells
Suffix - % increased Projectile Speed OR % to Global Critical Strike Multiplier
Here's a weighted search (require to be logged on the website) for decent wand: https://www.pathofexile.com/trade/search/Expedition/Yv3ZdEDIY
Higher Sum = Better wand. Make sure to check and modify the weight of each mods as necessary.
A +1 totem shield is usually weaker than a wand and harder to acquire. It can reach higher DPS than a wand but at a very expensive price and can't roll Projectile Speed. The +1 totem is only useful against boss or very specific situation. It will be less "on-hit" damage.
Weapon enchant: % increased AoE
Weapons Swap
We use Sinvicta's Mettle, Ezomyte Axe as weapon swap. With this axe equiped, as long as our totem kill one enemy, we gain Rampage. We can then swap back to our main setup while keeping Rampage active.
Rampage give % increased Damage and % Movement Speed.
Rings
Here we want to use Essence Worm, Unset Ring on our left slot and a Magic Ring in our right slot (for Hexproof from Viridi's Veil, Praetor Crown).
Essence Worm, Unset Ring allow us to use an Aura without reserving any Mana, which is great since we use our Mana as EHP with Mind over Matter and our Ascendancy. Check the Aura section in the Gems section for more info.
As for the Magic Ring, you want to use it to fill the missing Elemental Resistances you might have (Implicit and Suffix) to reach 75% and by using Prismatic Catalyst to further enhance this. If you are missing Mana, you can get Mana as Prefix (or craft it), otherwise Life is a good Prefix
Amulet
This build use Zerphi's Heart, Paua Amulet with Noxious Catalyst to enhance the global Chaos Damage.
Zerphi's Heart, Paua Amulet allow the damage from our Forbidden Rite Totem to Chill, Shock and Ignite.
This allow us to use Hypothermia Support on our primary link. Hypothermia do apply on the first hit.
It also give us almost permanent Soul Eater which is insane for clear speed and in general. I use Vaal Haste to apply Soul Eater, but any Vaal Skill would do.
Make sure to wait that the Soul Eater desactivate (20 seconds) before reusing your Vaal Skill, or it won't restart it
The big downside is the increase in attribute. The build require 210-222 Strength and 201 Dexterity.
We deal with the Attribute Requirement with a very specific skill tree and a well-rolled Coward's Legacy, Chain Belt.
Anoint: Whispers of Doom (+1 curse) - 3 Golden Oil
Belt
Here we use Coward's Legacy, Chain Belt with Intrinsic Catalyst or Accelerating Catalyst if you don't need the extra attribute.
This belt give us Low Life and come with a decent amount of Attribute. The Movement Speed is also very good. The curse doesn't affect us since we have Hexproof.
This allow us to use Pain Attunement Keystone in the tree for 30% more Spell Damage and allow us to use Panicked Prefix Flask.
Best enchant: Enemies Withered by you have -6% to all Resistances (Do work on totem)
Other: 15% increased Area of Effect while you have Arcane Surge OR Enemies Hindered by you have 50% reduced Life Regeneration rate
You can also consider to use an Headhunter, Leather Belt for juiced, delirious maps or Simulacrum, etc.
Jewels
List of Unique jewels that we use:
Self-Flagellation, Viridian Jewel - This give us a lot of % increased damage with Soul Mantle + Hexproof.
Rain of Splinters, Crimson Jewel - This is a +2 to projectile, the reduced (not less) % damage is easily mitigated. Massive damage boost with Forbidden Rite.
Watcher's Eye, Prismatic Jewel - Depend on your Aura, either Zealotry or Haste in my case. For Haste, you want increased Cooldown Recovery Rate of Movement Skills and maybe also Phasing. For Zealotry, Increased Critical Strike, Increased Damage Taken and Cast Speed are decent.
You can also get % critical strike multiplier with Precision or Damage Taken as Mana/Mana as Energy Shield Clarity as a bonus but the cost will be way higher.
For Rare Jewels, here are some of the mods we are looking for:
Prefix - % increased Totem Life
Prefix - % to Critical Strike Multiplier while Dual Wielding
Prefix - % increased maximum Life
Prefix - % increased maximum Mana
Suffix - Elemental Resistances (to be at 75%)
Suffix - % to Global Critical Strike Multiplier
Make sure your elemental resistances are capped before going for more damage.
We do not use Clear Mind, Cobalt Jewel for the simple reason that a good Rare Jewel is better.
Cluster
Large
Added Small Passive Skills also grant: 4% increased Mana Regeneration Rate
1 Added Passive Skill is Touch of Cruelty
1 Added Passive Skill is Unholy Grace
1 Added Passive Skill is Unwaveringly Evil
There's many good clusters, but I personally use one Large Chaos Cluster with two Medium Totem Cluster.
We want two Ancestral Preservation to reach maximum Chaos Resistance % on our totem (only matter because of Soul Eater). Those node are also very good DPS increase.
We also want Sleepless Sentries for Onslaught, but the cluster is very hard to roll and can be quite expensive.
The next best node is Ancestral Reach. The 25% increased Totem Placement range is massive for survivability. Other node can be decent if you can't afford those.
We want either 4 or 5 Passive Skills on them to not waste any points.
As for the Large Chaos Cluster, we want Touch of Cruelty and Unholy Grace. To save point, we also want Unwaveringly Evil or Dark Ideation on the cluster with 8 Passive Skills, so it will only cost us 5 points to get what we want.
If you want to use another medium cluster, you can consider using a Voices, Large Cluster Jewel at a very expensive price (3 socket for 40ex+ and 1 socket for 180ex+).
Flask
1 - Bubbling Divine Life Flask of Staunching
This is our main source of instant life if something goes wrong. Also using this flask to remove Bleed.
If you have Coward's Legacy (Low Life), swap Bubbling for the Panicked Prefix.
2 - Bubbling Eternal Mana Flask of Dousing
This is our main source of instant mana if something goes wrong. Also using this flask to remove Ignite.
If you have Coward's Legacy (Low Life), swap Bubbling for the Panicked Prefix.
3 - Chemist's Diamond Flask of Heat OR Bottled Faith, Sulphur Flask
For extra global critical strike chance and to remove Freeze/Chill. If you have boots with the Cannot be Frozen mod, you can consider using Bottled Faith, which is more damage.
4 - Chemist's Amethyst Flask of Grounding
For chaos resistance and to remove Shock.
If you don't have a Medium Totem Cluster with Sleepless Sentries, you might want to consider using a Silver Flask in the meanwhile.
5 - Chemist's Quicksilver Flask of Adrenaline/Quickening/Curing
For the increased Movement Speed. You can use anything as Suffix here. I would personally recommend Quickening for the extra Cast Speed.
Anyone are welcomed to redistribute, copy, quote, reference or perform content in this site, if and only if he/she attributed the work
Apr
r4pg:PoE 3.14 Ultimatum Server Issues Fixing Progress
PoE 3.14 Ultimatum has been released for a few hours, but a large number of players have encountered server issues that are difficult to solve. GGG gave the latest news about when the server will be repaired normally.

May
r4pg:PoE Game Mechanics Q&A Guide
In order to answer queation that players feel uncertain, poe has compiled a mechanism Q&A guide, don't miss it!
Apr
r4pg:PoE 3.14 Ultimatum Top Mauarder Starter Builds
Poe4orb has prepared the latest PoE 3.14 Ultimatum Top Mauarder Starter Builds collection. Check out these most popular ultimatum builds of Juggernaut, Chieftain and Berserker now!
Apr
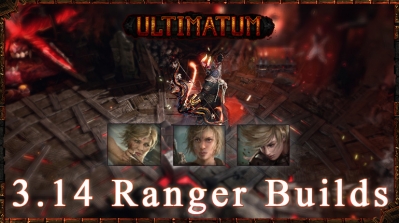
r4pg:PoE 3.14 Ultimatum Top Ranger Starter Builds
Poe4orb has also prepared the latest PoE 3.14 Ultimatum Top Ranger Starter Builds collection. Check out these most popular ultimatum builds of Deadeye, Pathfinder and Raider now!
Apr
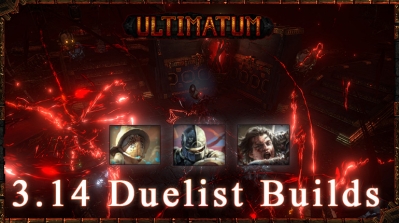
r4pg:PoE 3.14 Ultimatum Top Duelist Starter Builds
Poe4orb has prepared the latest PoE 3.14 Ultimatum Top Duelist Starter Builds collection. Check out these most popular ultimatum builds of Champion, Gladiator and Slayer now!
Apr
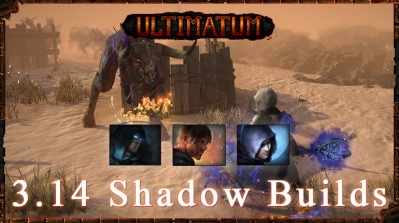
r4pg:PoE 3.14 Ultimatum Top Shadow Starter Builds
Poe4orb has prepared the latest PoE 3.14 Ultimatum Top Shadow Starter Builds collection. Check out these most popular ultimatum builds of Saboteur, Trickster, Assassin now!