(
(

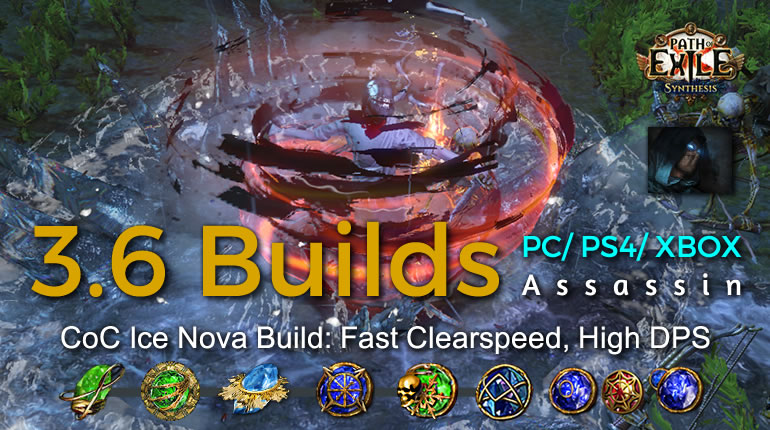
POE Synthesis Shadow Ice Nova Assassin Build - Fast Clearspeed, High DPS
A chilling circle of ice expands from the caster. If the caster targets near their Frostbolt projectiles, it will expand from a number of those projectiles instead. If this skill would repeat when cast this way, it will instead expand again from the same projectiles after a short delay.
Ice Nova is a spell that casts an expanding circle of cold damage. support gem that causes linked spells to trigger when the player scores a critical strike with the attack skill it is linked to. We use CoC linked spells to trigger.
Quick Jump
Pros & Cons
Pros
- + Up to 7m Shaper DPS (~2 sec per phase)
- + Amazing clearspeed and Movement Speed
- + ~8000 EHP @lvl 90
- + Everything dies instantly with best defense
Cons
- - Melee Can be hard to dodge stuff with Cyclone • Not the cheapest build out there (not very expensive either).
Skill Tree
Ascendancy
Unstable Infusion -> Deadly Infusion -> Opportunistic -> Ambush and Assassinate.
Bandit:
This quest is given to you by Eramir in the Forest Encampment after you complete Through Sacred Ground or talk with any of the bandit leaders. There are three different bandit leaders. You can either side with one of them (and kill the other two) to get the respective reward or you can kill all of them to get the reward from Erami - from Gamepedia
Help Alira. Kill Oak and Kraityn. From this we get Critical Strike Multiplier, some Elemental Resistances and Mana Regeneration - all of which are very much needed for this build.
Pantheons
Major God: Lunaris. Offers useful Physical Damage mitigation and Movement Speed through packs. I also recommend upgrading this god as it offers Dodge and Chance to avoid projectiles.
Solaris is the best defensive option against end-game bosses like Shaper, Elder, Mastermind, Guardians etc. Definitely upgrade this as well when possible.
Minor God: Gruthkul. More Physical Damage mitigation. Upgrading this god also reduces enemies' Attack Speed when they hit you by 8% (quite a lot!).
Garukhand can be a good alternative for mapping after upgrading it for 6% Movement Speed.
Yugul can also be used against encounters involving Cold Damage such as Elder or Shaper.
Skill Tree:
After level 80, when you travel through +10 Intelligence/ Strength/ Dexterity nodes for jewel sockets (or other important node wheels), you could skip those +10 stat nodes for something more beneficial (like a 10% Increased Elemental Damage node) and remove it later once you have enough levels to reach that jewel socket.
For example, at lvl 92 you should get the Light of Divinity node, at lvl 93 the Divine Favour node and at lvl 94 you should respec these 2 nodes and get a jewel socket.

Gems Setup
Gems in each piece are listed in order of importance, as well as in their respective gem colours for your convenience. For leveling gems check the leveling section.
To color your items cheaply, use the Vorici Chromatic Calculator site . You can also use the Jeweller's method (Google it if you don't know what this is).
Body Armour
Cyclone -> Cast on Critical -> Ice Nova -> Increased Critical Strikes -> Hypothermia -> Elemental Focus or Fortify or Concentrated Effect or Increased Area of Effect.
I recommend Elemental Focus as the 6th link for starters, as it will offer reliable damage and can easily be swapped with Concentrated Effect should you wish. If you want to be sure you have Fortify up ALL the time and don't want to Leap Slam/ Shield Charge around every 5 seconds, Fortify as the 6th link is a great choice. Damage will be more than enough for mapping or bossing and this is what I personally run with most of the time for smoother playstyle. I do swap it for Concentrated effect though for End-Game Bosses where I use Shield Charge instead to generate Fortify instead
You can experiment with these and see which you prefer, especially if you have a white socket in your chest (can be acquired through beast crafting, Vorici syndicate member on research, or corruption).
Eventually, try to get lvl 21 Ice Nova and 20% quality on all support gems.
Cospri's Malice
Frostbolt -> Ice Nova -> Life Leech
Very important: Make sure Frostbolt is socketed above Ice Nova. Gems are triggered in order from top to bottom and we want Frostbolt to always trigger first. Remember Ice Nova's interaction with Frostbolt: If there are at least 2 Frostbolt projectiles around us, Ice Nova is cast 2 times instead of 1, effectively doubling it's damage. We also use Life Leech support as these two spells will have enough damage and proc rate to help us reach Maximum Life Leech Rate very fast (in just 0.35 seconds against a single target, instantly in packs), giving us the freedom of not using Warlord's Mark or investing in leech via uniques
Why use a second Ice Nova here?
Cospri's trigger cooldown is the same as CoC, meaning we can trigger 6 spells per second. We don't need 6 Frostbolt casts per second, however. If 2 spells are socketed, the trigger will alternate between them, resulting in 3 Frostbolt and 3 Ice Nova triggers per second. This Ice Nova - like our main one in the chest - also interacts with the Frostbolt projectiles and is cast 2 times per trigger. This combination offers way better damage, as well as more hits per second which is important for reaching our maximum Life Leech Rate faster (9 hits per second with this combination vs 6 hits per second without Ice Nova).
Shield
Shield Charge or Leap Slam -> Faster Attacks -> Fortify
Choose your movement skill of choice (Shield Charge will feel smoother with this build). Pretty basic setup to generate Fortify.
Note: We do not use these movement skills to move fast around the map but only to generate Fortify when needed. Pure Movement Speed with Alchemist's Quicksilver of Adrenaline + Flask nodes at skill tree + Silver Flask (if you use it instead of Basalt) is the preferred way to achieve faster clearspeeds.
Helmet
Blasphemy -> Enfeeble -> Herald of Ice (replaced with Discipline when we have the Watcher's Eye shown in the gear section) -> Phase Run or Decoy Totem or Vaal Righteous Fire or Enlighten.
Important: If you are having Mana Problems with this setup, check the "Important Notes & Gameplay Tips" section of the guide.
Also important: Have Quality on the Blasphemy gem for Increased Curse Effect of Enfeeble.
Use Warlord's Mark instead of Enfeeble for leeching life until you have Cospri's Malice with the above-mentioned gems.
Herald of Ice is replaced later on with Discipline once we have a Watcher's Eye jewel with "+30 Energy Shield gained for each Enemy Hit while affected by Discipline". This improves survivability greatly, with a very small reduction in DPS. Definitely worth it.
For the 4th gem on this setup we have lots of options as you can see. Pick the one that suits your play style.
Gloves
Cast When Damage Taken (lvl 1) -> Immortal Call (lvl 1) -> Frost Bomb (lvl 10) -> Summon Chaos Golem (lvl 3).
Do not level up these gems more than what is shown so that we can trigger them faster and more often
Frostbomb for extra damage, Immortal Call and Chaos Golem for Physical Damage mitigation.
Boots
Vortex -> Bonechill -> Unbound Ailments -> Arcane Surge (low lvl).
SUPER IMPORTANT SETUP! ALWAYS USE THIS VORTEX ON BOSSES AND TANKY ENEMIES. It increases our Damage through Bonechill, our Critical Strike Chance through the Cospri's Malice mod, our Ice Nova Damage through Hypothermia and Pandemonius' Cold Penetration against Chilled Enemies, it provides Arcane Surge for even more Damage and Mana Regeneration and it also slows down enemies' Action Speed (similar to Temporal Chains). So especially against high HP enemies that we can't normally Chill just by using CoC Ice Nova, this setup doubles our Damage Output. Never forget to use it!
Vortex is now instant cast, which means we can use it while cycloning! We also link it with Unbound Ailments to increase the effect of Chill, further increasing Bonechill's damage and slowing enemies' Action Speed even more (yes, "Increased Effect of Chill" works with the ground effect of Vortex).
Gears Setup
The MOST IMPORTANT part while figuring out our gear, is to make sure our attack speed does not exceed the CoC trigger limit. CoC can trigger a spell reliably 6.06 times per second (it has a 165ms cooldown)** (increased by the "Increased Cooldown Recovery Speed" mod of at least 14% - keep reading to see why we need at least 14%)**.
Therefore, we need to make sure we hit enemies slightly slower than 6.06 times per second and NOT more than that, as it will reduce our DPS.
Cyclone hits 2 times per "Attack". So 3 Attacks per Second or slower is about the optimal attack speed we want (unless we have 14%+ Increased Cooldown Recovery Speed on our belt or boots).
"The CoC cooldown is 150ms, not 165ms!!!" - Check This post by u/psychomap which explains why this is and which also explains why we need at least 14% Increased Cooldown Recovery Speed for it to have any effect whatsoever.
"How to achieve 3 Attacks per Second?" - With a 8% or 9% Attack Speed (NOT more than that) Cospri's Malice, Starkonja's Head, no attack speed on the rest of the gear and with this specific tree, we should reach 3.0 Attacks per Second WHILE NO ONSLAUGHT FLASK IS USED (don't use it for single target. We can still use it for better clearspeed through packs though since we crit many enemies and which means attack speed doesn't matter that much. We can also just use a Basalt Flask instead).
Once we have at LEAST 14% Increased Cooldown Recovery Speed from our belt or boots, the maximum CoC triggers per second become 7.57, as explained by the post i linked above. So the optimal Attack Speed for Cyclone would be 3.75 Attacks per Second or slower.
To achieve that, we will upgrade to a 14% Attack Speed Cospri's Malice and also use our Onslaught Flask on bosses from now on. Simple as that!
If you want to keep using Basalt Flask instead of Onslaught, take the "Coordination" node in the passive skill tree and 8% Attack Speed (not more than that!) from rare gloves or a jewel. Coordination node and 8% Attack Speed with swords from a single jewel is the most cost-effective way to do this. (Big thanks to Aim_Deep for this idea!).
You can always check your Attack Speed at your hideout (Don't forget to select Cyclone. If you have around 2.0 Attacks per Second you are looking at Default Attack). Look for 3 Attacks per Second or 3.7 Attacks per Second with 14%+ Increased Cooldown Recovery Speed. Make sure to also test it with Onslaught Flask if you plan to use this flask.
-----------------------> Want to play Devoto's for more clearspeed?
Since you are doing this for clearspeed, I'll assume you also use Silver Flask. For this, it is required to get 14%+ Increased Cooldown Recovery Speed from belt or boots. Then you need 8, 9 or 10% Attack Speed on Cospri's Malice, not more than that.
Again, test your Cyclone's APS at your hideout to make sure.
Keep in mind that this version will be less tanky.
----------------------->Playing with an Aura Bot?
Without 14%+ Incresed Cooldown Recovery Speed: Replacing Starkonja's Head for a Rare Helmet, 8% Attack Speed on Cospri's Malice and no Onslaught Flask will let you use Haste up to level 7. You can use Onslaught on packs if u want as you will crit many enemies and attack speed doesnt matter that much or use Basalt Flask instead.
With 14%+ Increased Cooldown Recovery Speed: Replacing Starkonja's Head for a Rare Helmet and 8% Attack Speed on Cospri's Malice and using Onslaught Flask will let you use Haste up to level 23. Again, if you want to keep using Basalt Flask instead of Onslaught, take the "Coordination" node in the passive skill tree and 8% Attack Speed from rare gloves or a jewel.
Remember that when you replace Starkonja's Head you will need more dexterity from rares overall to be able to equip Cospri's Malice. And in any case don't use Vaal Haste.
Order of Gearing and Explanation
Stage 1: The Core - Once this gear stage is completed and assuming you're at a reasonable character level, you should be able to complete everything, including Uber Elder.
Move the mouse to see the bold equipment needed to affix
1) Gifts from Above - Very cheap item. Amazing Critical Strike Chance, survivability with Consecrated Ground and Increased Damage.
2) Lycosidae - Hits cannot be Evaded + some Life. No need to invest in Accuracy with this item.
3) Cospri's Malice (8% or 9% Attack Speed, NOT more! check spoiler above) - This item makes this build come alive. Increases our DPS by a mile and lets the fun begin.
4) Frozen Trail - Allows us to not socket GMP on Frostbolt and socket Life Leech instead (remember we need at least 2 Frostbolt projectiles for our Ice Nova). Should also be easy to get a useful corruption on this one. Also keep in mind that you don't actually have to allocate 40 Intelligence in radius, it just needs to be there.
We only need 1 Frozen Trail since we just need at least 2 Frostbolt projectiles at once for the interaction with Ice Nova. An extra Frozen Trail would be a waste of a jewel socket compared to a good rare jewel.
5) Starkonja's Head - Lots of Dexterity (needed to equip Cospri's Malice) and lots of Life. Using the less tanky Devoto's Devotion instead of Starkonja's Head for greater clearspeed is possible but be careful not to exceed attack speed limit for optimal CoC DPS (will be impossible to do without a 14%+ "Increased Cooldown Recovery Speed" on belt or boots - see the spoiler below for more information).
6) Loreweave (Corrupted) - 80% Max Elemental Resistances is MANDATORY here, good Elemental Damage and Critical Strike Chance and Life rolls are also great, but of secondary importance. This is an amazing chest in every way.
7) The Pandemonius - Not really a "core" item, but a really amazing choice for this build. It greatly improves single target and offers perma blind on enemies increasing survivability.
- For Rares, try to have 90+ Life on all of them for this stage.
- For Jewel sockets, try to have 7% Increased Maximum Life and a Critical Strike Multiplier mod (best available jewel mods for this build are shown further below).
Stage 2: The Overpowered - These upgrades will improve both Damage and Survivability. Great to have if you want to push for higher levels or farm End-Game Bosses.
8) Watcher's Eye jewel with "30 Energy Shield gained for each Enemy Hit while affected by Discipline - When you get this, drop Herald of Ice and socket Discipline. This will increase EHP by about 1000 and also improve sustain greatly, since Gain on Hit mods work in conjunction with Life Leech. Damage is very slightly reduced, but it is definitely worth it, as it will increase again with the next upgrade.
9) Mark of the Shaper - This replaces Gifts from Above. Combine it with an Elder ring (preferably a Coral ring with 90+ life). Compared to gifts from above, this ring increases both our damage output and also our EHP by a significant amount.
10) Rare Belt with Increased Cooldown Recovery Speed (at LEAST 14%, more than 14% doesn't matter and less than 14% is completely useless) - Improves damage even more. Check the important spoiler above to see why we need at least 14%.
11) Cospri's Malice (14% Attack Speed) - After getting Cooldown Recovery Speed, we now need this extra Attack Speed (again, check the spoiler above for more info). Sell your old Cospri's Malice and buy a new one.
- For Rares, try to increase to 105+ Life on all of them for this stage.
- For Jewel sockets, try to have 7% Increased Maximum Life + 2x Damage mods (best available jewel mods for this build are shown further below).
Stage 3: God Tier - These next items are expensive and not necessary at all. If you want to have some fun and take this build to the extreme, this is how to do it:
12) Unnatural Instict + 2x Might of the Meek jewels - Once you get those you will have to change the tree. Click here for the lvl 98 Tree. All 3 of these jewels are socketed at the scion starting area, with Unnatural Instinct at the right side. Also note that Cospri's Malice needs to change again and has to be 13% Attack Speed or lower.
This whole change by itself will not affect Life or DPS. However, it will offer you:
A) 23% Attack speed and 16% Movement speed. That is basically the benefits of an onslaught flask (If you used Silver Flask you can now drop it for free and use Basalt Flask. If you used Basalt Flask already, then you benefit from the better clearspeed and from savings from attack speed investments which you can now respec).
B) 84% Elemental Resistances. This enables us to cap resistances while using an extra unique item, which means we get a big benefit from our next upgrade:
You can choose either #13 or #14 as the next upgrade, depending on if you want more damage or Vaal Pact for more sustain.
13) Bubonic Trails with 2 Abyssal Sockets - We lose 2 gem sockets (drop Unbound Ailments and Decoy Totem. Use Blasphemy -> Enfeeble in Bubonic Trail. Discipline moves to a 4-link with the Leap Slam setup. Don't link Discipline in the Vortex setup as Arcane Surge will make Discipline reserve more Mana, so move Vortex setup to the shield). To make this an actual upgrade, make sure you get good Abyssal Jewels with 40+ Life + 2x Damage mods (best available Abyss jewel mods for this build are shown further below). Try to use at least one of each of these types of Abyss jewels: Hypnotic, Murderous, Searching. Do not use a Ghastly Eye jewel, these don't have anything good to offer and they are not worth it. If done correctly, these boots should increase damage by more than 10% and also Life by about 50.
14) Atziri's Acuity or High-end Crafted gloves with ~120% Increased Damage - To do this upgrade you will need to get lots of resistances from your 2 remaining rares, the belt and the ring (do not sacrifice the Cooldown Recovery Speed mod and the Shock nearby Enemies while Focused mod or this won't be worth it). From these two combined you will need about 70% Fire Resistance, 70% Lightning Resistance and 40% Cold Resistance. Ideally you want your resistances to be the same for the best use of the Wise Oak Flask. It shouldn't be too hard to achieve considering you've spent so many exalts already! If you choose Atziri's Acuity, it will give you the benefit of Vaal Pact for even more sustain and also offer some Critical Strike Chance. This is my recommended item since damage is crazy high already.
If you want even more damage though, you can craft or find rare gloves with: 1) ~90 Life, 2) (30–50)% increased Damage with Hits against Chilled Enemies, 3) (24–28)% increased Damage during any Flask Effect, 4) (37–43)% increased Damage while Leeching and the hybrid mod: 5) (20–22)% increased Elemental Damage if you've dealt a Critical Strike Recently + (15–16)% increased Global Critical Strike Chance.
- For rares, again you want 105+ Life on all of them.
- For jewels, you can spend even more exalts to get 7% Increased Maximum Life + 3x Damage mods (best available jewel mods for this build are shown further below).
- Other than that, if you have some Mirrors laying around, getting crazy corruptions or even double corruptions on your items (like +1 to socketed gems loreweave, Enfeeble on hit Atziri's Acuity), is the last thing to improve on.
Rare Items
From our Rare items we need the most possible Maximum Life we can get, Elemental Resistances and some Dexterity. We need about 30 Dexterity from one rare to be able to equip Cospri's Malice, assuming we have Starkonja's Head already.
Energy Shield is the best base for this build defensively since at some point we get ES gained on Hit.
Also, definitely try and get the new craftable mod "Shocks nearby enemies for 2/3/4 seconds when you Focus" on your ring. Basically free 20% more (not "increased") damage!
What is "Focus"? When you have an item with any "Focus" mod (like this ring) you will get a usable skill in your skill bar which is instant cast (can use it while cycloning) and it applies the effects described buy the mods. Focus lasts for 4 seconds with a cooldown of 12 seconds (lowered by the "Increased Cooldown Recovery Speed" mod).
Other good prefix mods (we need suffixes for resistances) include:
Belt: Increased Cold Damage, Increased effect of Flasks, Increased Damage, Energy Shield, Armour.
Rings: Life/ Mana Gained for each Enemy Hit, Cold Damage leeched as life, Added Damage to Spells, Increased Damage, Energy Shield.
Rare Jewels: #1 Priority is "% Increased Maximum Life", followed by "Increased Critical Strike Multiplier" (Cold/ Elemental/ Spell), followed by "Increased Damage" (Cold/ Area/ Spell/ Spell while using a Shield).
Rare Abyss Jewels: #1 Priority is "40+ Life", followed by "Adds Cold Damage to Spells" (normal or while holding a Shield), followed by "Increased Critical Strike Multiplier", followed by "chance to Hinder Enemies on Hit with Spells" followed by "Damage Penetrates 2% Elemental Resistance if you haven't Killed Recently", followed by "Adds Fire (or Lightning) Damage to Spells". Movement Speed and Phasing mods can also be good.
Honorable Mentions
- Kaom's Roots is a good choice if you want to run Uber Elder more safely. Check your elemental resistances if you run these.
- You can also have Jaws of Agony with the 3-link Ice Traps -> Cluster Traps -> Multiple Traps in your weapon swap (press X in-game) and spam Ice Traps if you want to start a fight with maximum Power Charges. However this isn't needed, I prefer using my weapon swap to level up other gems.
- A Watcher's Eye with "Gain (14-18)% of Maximum Mana as Extra Maximum Energy Shield while affected by Clarity" combined with a level 1 Clarity can increase Energy Shield by a lot in the cost of a Gem Slot. It's very expensive though and not that important since our ES sustain is limited (ES on hit) and won't help us sustain big amounts of ES. You also have to sacrifice some damage since you have to replace a rare jewel.
Flask Setup
Move the mouse to see the bold flask needed to affix
Life Flask: Catalysed Eternal Life Flask of Staunching or Seething Divine Life Flask of Staunching (Catalysed Hallowed Hybrid Flask of Staunching for No Regen maps, to also get your Mana up).
Experimenter's Diamond Flask of Heat
The Wise Oak - Make sure Cold Resistance is the highest of your Elemental Resistances to benefit from this flask's Cold Penetration.
In this slot it's either Chemist's Silver Flask of Warding (Don't use it for single target as it will increase attack speed above the optimal and reduce DPS, check the spoiler under the "Gear & Uniques" section) or Chemist's Basalt Flask of Warding for more Physical Damage mitigation. Both with at least 23% "Reduced Flask Charges used" so that they don't use more than 30 out of 60 charges per use.
Tip: For fights like Uber Elder/ Shaper/ Mastermind/ Delve Bosses/ Breachlords where Curse Immunity is not needed, the new crafted mod "(60-80%) Critical Strike Chance during Flask Effect" is a great choice.
Alchemist's Quicksilver Flask of Adrenaline. Try to get exactly these mods max roll on this one. I can't stress enough how noticeable the difference is.
Enchantments
Enchantments in each piece are listed in order of Importance.
Helmet
- 30% Increased Enfeeble Curse Effect (#1 for 99% of cases),
- 40% Increased Ice Nova Damage (#1 against Shaper, Elder and their Guardians, Delve Bosses and Syndicate Mastermind, as these have 80% less curse effectiveness so Enfeeble losses value),
- 100% increased Effect of the Buff granted by your Chaos Golem, 4. 12% Increased Ice Nova Area of Effect.
Boots
- Damage Penetrates 10% of Elemental Resistances (offers the most damage but is hard to get)
- Adds Lightning Damage if you haven't Killed Recently (not far behind in terms of damage actually)
- Adds Cold Damage if you've been Hit Recently (better damage than the previous one but requires you to get hit)
- Increased Movement Speed if you haven't been Hit Recently
- Regenerate % Life and Mana per second if you were Hit Recently.
Gloves
- Commandment of Flames on Hit
- Commandment of Tempest on Hit
- Commandment of Blades on Hit
- Commandment of Winter when Hit.
Leveling
Move the mouse to see the bold uniques needed to affix
Key mods to look for while leveling: Maximum Life, Increased Damage (Spell/ Cold/ Elemental/ Area), Elemental Resistances, Movement Speed.
Flasks: Upgrade your Life Flask regularly. Try to have 2 Quicksilver Flasks (preferably with the mod "of Adrenaline"). Get a Diamond Flask and a Silver Flask when you have access to them. Try to get the mod "of Staunching" for Bleed removal as fast as possible.
Good Uniques to get early on: Lifesprig, then switch to double Axiom Perpetuum, Goldrim, Tabula Rasa, Belt of the Deceiver, Wanderlust. Also, Seven-League Step (expensive) if you want to level up even faster.
Lifesprig, Axiom Perpetuum, Goldrim, Tabula Rasa, Belt of the Deceiver, Wanderlust, Seven-League Step
Extra Uniques for when you switch to CoC
Widowmaker for good Critical Strike Chance, Gifts from Above (part of the main build as well), Maligaro's Virtuosity, Doedre's Damning for double curse (double curse helps until we get our core items), Lycosidae (part of the main build as well). Use Light of Lunaris or a rare shield with Life, Spell Damage, Critical, Elemental Resistances etc. if you don't have currency for Lycosidae just yet. Funnily enough, even at this level we get the maximum of 6 CoC triggers per second with just these items, the level 42 skill tree and a Silver Flask (we probably won't always crit yet though).
Note: The levels at which the following gems are listed is based on their required level. Depending on your quest progression, you might unlock these at a slightly higher level than what is shown.
Levels 1-11
Freezing Pulse -> Arcane Surge (lvl 1). Keep Arcane Surge at level 1 for now, as we want it to give the buff with just 1 cast.
- At level 8: Support Freezing Pulse with Added Cold Damage and Added Lightning Damage (keep Arcane Surge for later).
- At level 10: Flame Dash -> Arcane Surge (lvl 1).
Levels 12-44
Switch main spell to Storm Brand and also pick up Blade Vortex for additional single target DPS. Support these with Added Cold Damage and Added Lightning Damage. It's preferable to have them on seperate links.
Also, go for the "Runesmith" node on the passive skill tree for more Brand damage and an additional brand.
- At level 16: Use Herald of Ice and Herald of Thunder.
- Also at level 16: Pick up Brand Recall and link it as Flame Dash -> Arcane Surge (lvl 1) -> Brand Recall. Brand Recall will bring all the brands to you and activate them. Use it on packs to one shot them, or for single target.
- At level 18: Links for Storm Brand and Blade Vortex changed to:
Storm Brand -> Elemental Focus -> Controlled Destruction -> Added Lightning Damage. Add Onslaught and Lightning Penetration and if you have a Tabula Rasa.
Blade Vortex -> Added Cold Damage -> Added Lightning Damage -> Controlled Destruction.
- Also at level 18: You can add Faster Casting to your Flame Dash -> Arcane Surge -> Brand Recall setup.
- At about level 30 and after you complete Siosa's quest, it's a good idea to buy many of the build's main gems from her to start leveling them up.
- At level 31: Get this 4-link setup to help with single target DPS (remove Blade Vortex): Lightning Spire Trap -> Trap and Mine Damage -> Advanced Traps -> Added Lightning Damage.
- At level 34: Get Ice Golem (lvl 3) and don't level it more than level 3 as we will use it in our CWDT setup later.
- Also at level 38: Get Cast When Damage Taken (lvl 1) -> Immortal Call (lvl 1) -> Ice Golem (lvl 3).
Level 44-100
After: 1. Completing the first labyrinth for Power Charge generation, 2. Having a Diamond Flask, 3. Having a weapon with good Critical Strike Chance (Widowmaker is great as suggested earlier) and 4. Having a 4-link item for Cyclone -> Cast on Critical Strike -> Ice Nova -> Increased Critical Strikes you can switch to CoC Ice Nova! You can switch to it later if you want to improve your items some more.
You can start using the build's main gems, but with some differences for now:
- Keep Lightning Spire trap 4-link to help with single target DPS for now.
- If you have a Tabula, use Cyclone -> Cast on Critical -> Ice Nova -> Increased Critical Strikes -> Frostbolt (have a Frozen Trail jewel first) -> Hypothermia.
- If you have access to a Doedre's Damning ring, switch out your heralds for Blasphemy -> Warlord's Mark -> Assassin's Mark, or if you don't have the ring, use Herald of Ice and Blasphemy -> Warlord's Mark.
In any case, keep leveling Herald of Ice, as we will use it later.
- Ice Golem instead of Chaos Golem since our Critical Strike Chance isn't that great yet.
When you complete the second Ascendancy replace Doedre's Damning with a rare ring (or Gifts from Above if you don't have it yet) replacing Assassin's Mark with Herald of Ice (keep Warlord's Mark). Also replace Ice Golem with Chaos Golem.
Keep Warlord's Mark until you get your Cospri's Malice, then switch it for Enfeeble.
POB Link: https://pastebin.com/e6zZEEr1

Jan
Christmas and New Year Headhunters Winner List
Dear players, to celebrate the coming of Christmas and New Year, we are campaigning a unprecedented giveaway for you! Here is the final winners list. ( PoE character name)
Feb
POE Synthesis Tempar Elemental Hit Hierophant Build - Safe, Cheap, Great Clearspeed
Elemental Hit is an attack skill, executing a basic attack with added damage of a random element. An Elemental Hit may be performed with any weapon, or with no weapon equipped.
Dec
POE Betrayal League Syndicate And Safehouse Guide
The new Syndicate and Safehouse system was introduced in the betrayal league of POE. Although the new content brings new challenges, there are many players who can't grasp the theme of POE 3.5. Below we will focus on some of the players' doubts about the betrayal league about Syndicate and Safehouse. This guide is created for this purpose.

Feb
POE Synthesis Marauder Righteous Fire Chieftain Build - Cheap, Easy, Burning Everything
Righteous Fire is a spell that applies a buff on the player, rapidly burning themself and nearby enemies. It also increases the player's spell damage.

Dec
POE Betrayal Latest Popular Templar Builds - Inquisitor, Hierophant, Guardian
The Templar is Path of Exile's strength/intelligence hybrid class, a perfect balance of brawn and wits. In combat, this pious warrior is expert at augmenting his substantial offense with a wide range of magical abilities. Build your most powerful Inquisitor, Hierophant, Guardian league starters by browsing the Poe 3.5 Build we collected for you!

Dec
POE Betrayal Slayer Sunder Starter Build - Fast, Cheap, Easy To Leveling
Sunder is the vital skill in this build. Sunder is a melee attack creating a wave that travels forward and damages enemies in a straight line. This build completely immune to phys reflect enemies or maps. You can face-tank the entire Uber Lab in under 5 min’s while collecting keys and shrines along the main path. You can do this over and over and over again with basically no risk of death.